AutoPulse on the Playback Page
AutoPulse case data appears in several areas on the Playback page.
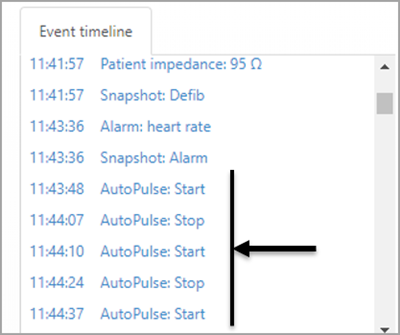
Event Timeline
The AutoPulse start/stop times display in the "Event timeline."

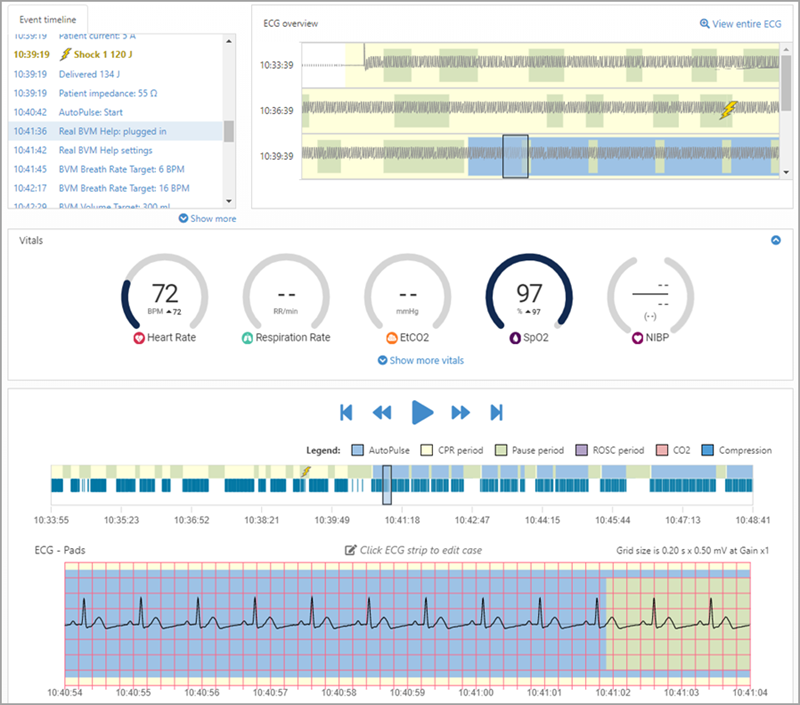
ECG Overview
AutoPulse start and stop periods appear in the "ECG overview" as blue shaded areas.

Use the ECG strip to edit pause periods over AutoPulse periods, add AutoPulse periods to the case, and edit existing AutoPause periods.
AutoPulse editing
If AutoPulse is enabled, users can make refinements to the AutoPulse auto-detection in their cases inside the CaseReview Playback page.
The AutoPulse editing features follow the same conventions as editing CPR time periods, Pause time periods, and ROSC time periods.
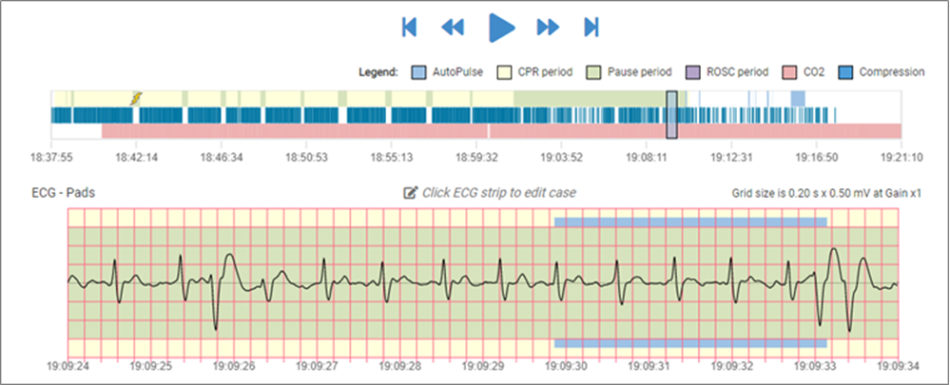
The following Playback page ECG snippets will be used for examples of each editing feature (blue shading is AutoPulse).
Any saved changes to the AutoPulse time period on the Playback, will impact the following pages. In addition, calculations that involved AutoPulse will update:
-
Performance Summary page
-
CPR Zoom page and the clipped segment views
-
Exports page: Individual compressions.csv report

-
Click anywhere in the editing field of the ECG.
-
If this period is within a CPR period, click the Add icon
 to create a start time on the ECG timeline.
If this period is not within a CPR period, you do not have to click the Add icon.

-
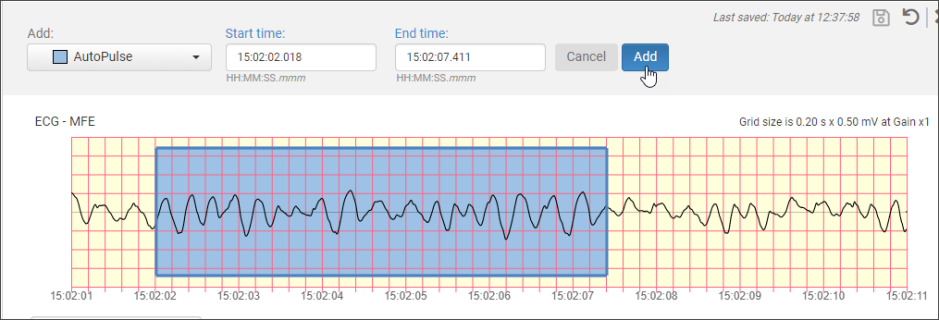
Click the Add field and select AutoPulse.

You will see that the start time is automatically filled in. This time is the time you clicked on the grid when you selected Add. This start time can be changed by the cursor or you can manually type it in.
-
Click the "End time" field and then manually enter the end time or click on a place on the chart.

-
Click the Add button. A blue shaded box will show the new AutoPulse time period you just created.

-
To complete this transaction, click the Save icon
 .
.
-
Click anywhere on the editing field of the ECG where an AutoPulse period exists.
-
Click the trash can.

-
On the confirmation window, click 'Delete.'

-
Click Save to save the changes.
 Note: if you just deleted the last AutoPulse period in the case, then AutoPulse = YES on the Case Details page will change to AutoPulse = NO.
-
Click anywhere in the editing field of the ECG and select the Split (scissors) icon.

-
On the confirmation window, click Split.

-
To complete the split, click Save
 .
.

Once the AutoPulse shaded area has been split, you can now move either the start end point and/or the end point to another time.

This allows the new AutoPulse time period to be moved, but only through the action of changing the start/end times. The time period will not slide along the ECG (nor will any other time periods, including CPR, pause, or ROSC time periods).
